Showing posts with label tutorial. Show all posts

Thursday, April 12, 2012

upcycled gift box... the tutorial (kinda)

I am going to confess right now... 
I am cheap thrifty,
plus I have a difficult time buying something 
that can be made, reused, repurposed, saved...


I needed a box to ship my jewelry orders out.
I looked at ordering boxes...
(for about a minute!)

I just knew that if I put my mind to it, I would come up with a better solution.


I had a flashback to the little paper towel roll vase that I made
a couple of years ago, and with a little adjusting ~ waalaa!
A new jewelry gift box for my creations!

(the original idea for this came from Somerset Life)

(the only problem is that now I want to make more of these!)
********
I think that they need to hang on doorknobs everywhere :)
********
I thought I would walk you through the process
just in case you want to make the gift boxes.

Instead of the ribbon looped on either side of the roll
I stapled it on the back and punched a hole on the front so that 
the ribbon could be slipped through and tied into a bow.


Using an extra strength glue stick, cover the toilet paper roll and then 
wrap it in the paper of your choice.
Staple the bottom shut,
and cover the staples with a scrap of doily or paper of your choice.
The one above was my prototype...
after that one, I left the extra paper at the top and tucked it inside
for a more finished look.  
( use the glue around the inside of the roll before you tuck the paper inside) 

flatten it out and stamp with your favorite stamps,
staple on the ribbon and use a hole punch on the front for
the ribbon to go through.
Tuck your treasure inside,
tie the bow, and there you go!


Now as these new garden series necklaces leave the shop
they will arrive more like a gift than a purchase!

I confessed at the beginning of the post to being thrifty,
now I must confess to NOT being the best tutorial creator in blogland!
I get so wrapped up in the creating part that taking pictures
doesn't enter my mind until the work is done.
please accept my apologies.  :)
If you have any questions at all,
please feel free to ask in the comments and I will get right back to you.

Well, back to the worktable for me...
Thanks so much for stopping by,
see you soon!

love,
Theresa
xoxooxoxo


linking to:


Tuesday, February 14, 2012

Happy Valentines Day!


Sometimes it feels good to make something just for us.  
So for the day of love I made us some scrap hearts to hang on the white branches
on the dining room mantle.


They are just about the only decoration that I have out for today.
But I think they do the trick.


I made the birds last year and put them back out for today.
They are made from script paper and have a tiny banner hanging from
their beaks that says I Do with little hearts.
They have turned pink do to using mod podge on top of 
an ink jet print but for today that works! 


so this is how I did it...
I put strips of lace on top of a piece of cheesecloth that was
on top of a piece of 8 1/2 x 11 cardstock.
make sense?


Then I sewed them across the paper.


I turned the paper over and drew hearts on the back of it.
I then cut the hearts out, and glued them to a piece of 
scrapbook paper.  I did this because you would be able
to see the backsides in the mirror.


Then I hot glued jewels and aluminum letters and numbers to them,
all things that mean something to us.
There are 7 of us, and X and an O for hugs and kisses,
612 for our address and the frozen charlotte well because,
who doesn't love a frozen charlotte?
:)


Happy Valentines Day Everyone!

love,
Theresa
xoxooxoxoxoxo

linking this to:

thanks for the parties girls!

Wednesday, October 26, 2011

grungy pumpkins, the tutorial...


pinch pot by Max
cinnamon pumpkin by me

want to make some?


here's another new favorite from none other than
Theresa Easy Peasy Hein


of course being as excited as I was to make these,
and being the bad tutorialist that I am, I did not take step by step photos.

(that is another reason why I like easy peasy)

step 1. buy some inexpensive faux pumpkins

step 2.  melt wax in a GW small crock pot
 I had some beeswax at the bottom of mine from last years beeswax collages and so
used that, but you could use broken white candles.
and you could use a double boiler over the stove but I like using a crock pot instead of my gas stove
.
step 3. Add some cinnamon, pumpkin pie spice and maybe
a dash of nutmeg for good measure into the wax. 
and by add I mean dump. I wanted mine kinda grungy so I used quite a bit.

step 4.  stir.

step 5. using an old paintbrush 'paint' the wax goodness onto the pumpkins
I did a few coats to really cover the pumpkins.
I also dunked the bottoms into the wax... whatever works!

step 6. while the wax is still warm and sticky sprinkle more cinn. on the pumpkins
and by sprinkle I mean shake vigorously.
I started doing this step over the crockpot and I have to say that I loved
how grungy the last batch came out.

yes, I said batch, they were that fun to make!


the response from the visitors to the show was wonderful.
They smell like what autumn smells like to me.

well, minus burning leaves, which I love, but have recently discovered that Hannah thinks is awful!
awful, really?

Well, there you have it easy peasy and all autumn-like!
I'd love to know if you make these and what you think :)
I bet the craft stores will be having a mad clearance sale on the pumpkins
after Monday, and just in time to get some on the cheap for your Thanksgiving decor!

love, 

Tuesday, March 29, 2011

easy peasy charms to make...


So, there I am in Hobby Lobby minding my own business, getting a few supplies in the jewelry findings section for the flowers and such and what do I see?  Fabulous silver bezels that require no soldering!  Oh I still love me some soldering, and will show you in just a bit more of what I have been up to, but these are the perfect charm to share without the cost or fear of the molten lava hot soldering iron!


They require few supplies, the most important being your imagination and free spirit!

After said bezel has been located you will then need to purchase some diamond glaze. There are other products out there that are similar, it is a dimensional glaze that will dry like a resin without the mixing part.
The product I used is called Scrabble and Glass Glaze by Sun and Moon craft kits, I found it on etsy and I know you can find diamond glaze on there too. I have used both and they both work great.  Mod Podge also makes a dimensional glue now that I think works the same way, but I could not find my bottle of that and so haven't tried it yet.

note to self... clean out the workroom!


O.k. this is very important, find a sweet picture... and then it must be LASER copied!  You will not be able to copy these on your inkjet printer, for some reason when the ink and glaze are mixed, the ink will turn different colors and run.


You can also take a picture right out of a vintage book like I did here.  These two are Mary had a little lamb and little Jack Horner from a vintage nursery rhyme book.
  I used the pattern on the bezel package to measure how big the picture could be and then just traced that on top of the picture in the book.  seriously easy peasy.


I love how stinkin sweet these are, those little books always catch my heart with a bit of nostalgia.


This one is a snippet of an original photo, you can use those too if you dare to!  I was on a roll and tried not to think of how bummed I might be when I can't go back and use the photo again. But sometimes a girls gotta do what a girls gotta do! 
We don't have a print shop in this one horse town I live in. 

For this one I measured the bezel pattern on to a piece of scrapbook paper and then cut the little girl out of the picture and glued her on.   I then cut out the word precious from an old book and added some detail with markers. 
So this one was a bit of collage fun too!


So you cut out the picture, and then embellish if you like, I added glitter to the one that says precious by putting a very thin bead of glue around the background paper and then sprinking on the glass glitter (also found on etsy).
Then you squeeze enough glaze onto the collage/picture, enough to fill the bezel to the top and leave it alone!
This is always hard for me to do, cuz I'm a bit impatient. shhhhhh.
O.k. before you run out the door to buy you some bezels... here are two important tips... DO NOT shake the glaze bottle!  It will cause bubbles in your glaze and you do not want bubbles on your charm but if you do get bubbles then just take a pin or toothpick and pop them.  Spoken from experience, I promise.

Because I am a thrifty kind of girl, I bought the bezels when they were 50% off, which HL does quite often so they cost maybe 1.00 a piece for the big one and I think 1.50 for the set of two. 

So there you have it, cheap and easy!
Something I never wanted to reveal about myself!  LOL

This was your tip from Theresa for Tuesday...

Thanks for stopping by!

Theresa xoxo

this just in... I'm linking up to Hope Studios for Tutorial Tuesday. and Tip Me Tuesday over at Tip Junkie and the Glitter Party over at Running with Glitter!  I'm headed over now to see what I can learn today!


Sunday, October 3, 2010

Pumpkin Crazy!

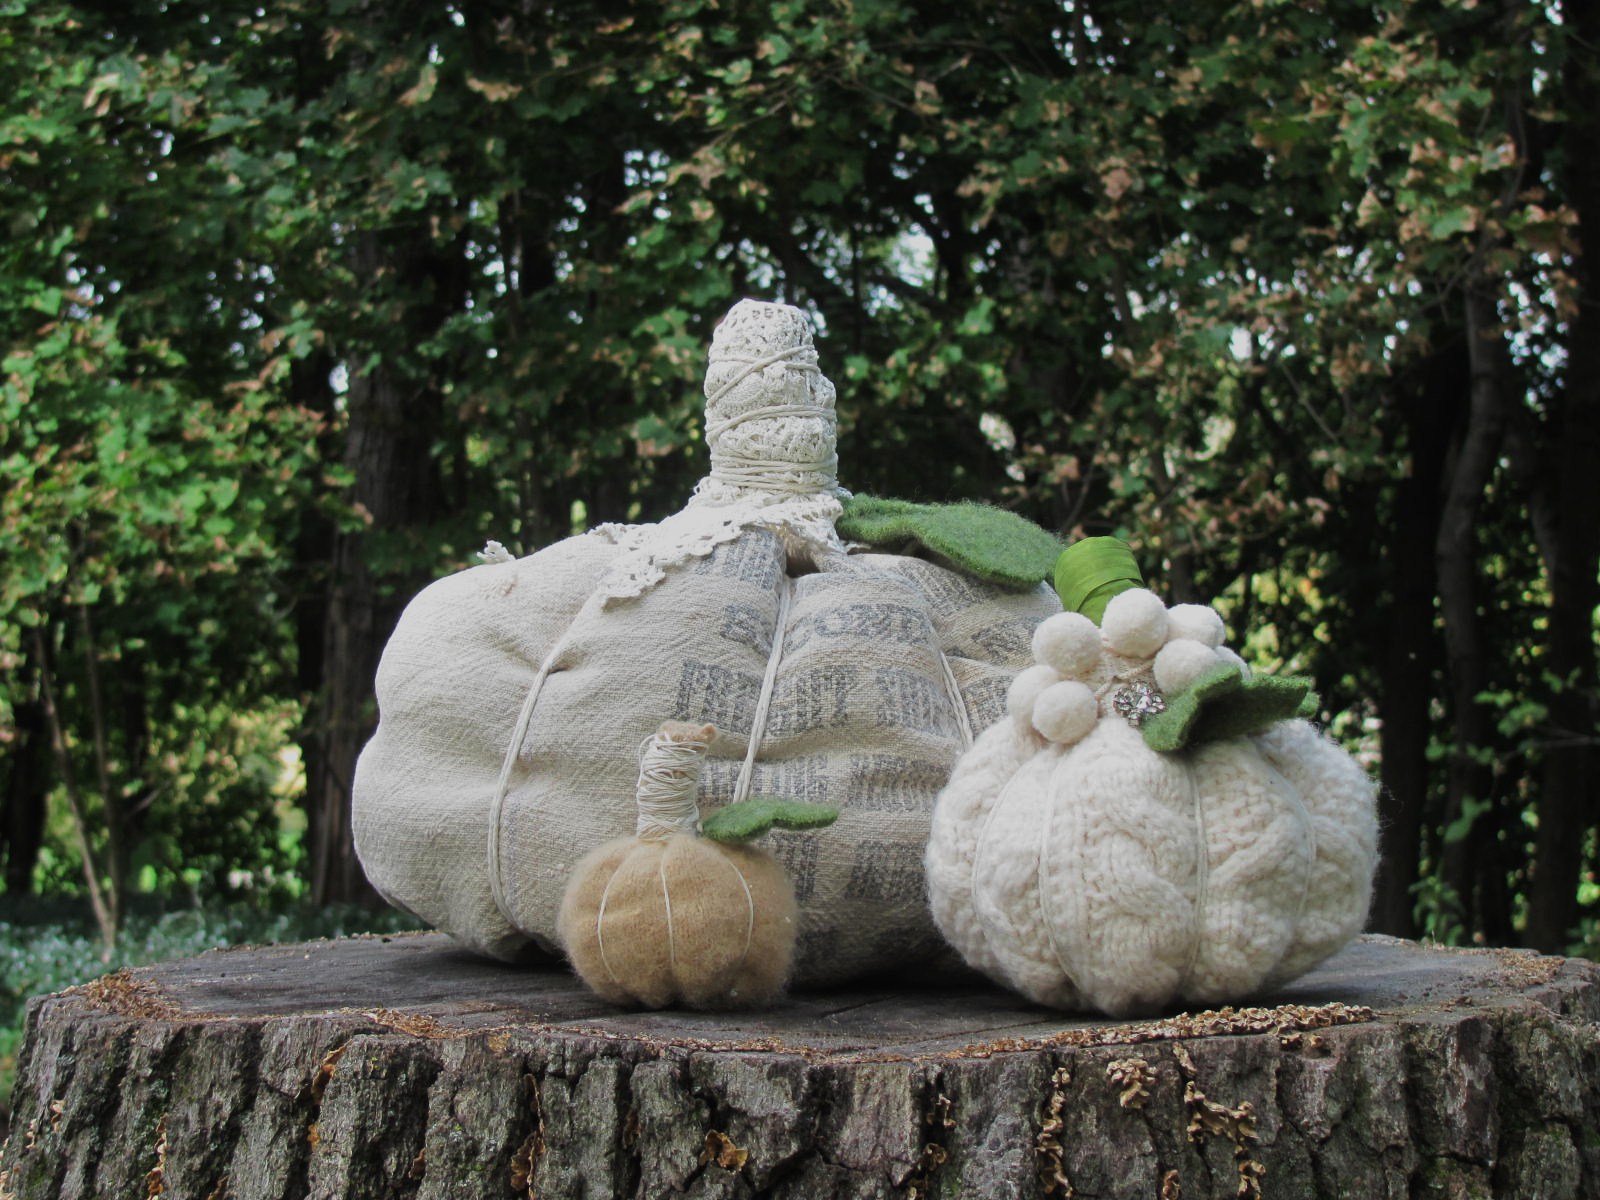
Happy Sunshiney Sunday! I wanted to pass this tutorial on to all of you who have scraps of wool, sweaters, maybe even a burlap bag or grain sack on hand...
they are way too much fun to make and are going to help me in my "I haven't made anything new for autumn" dilemma! The tutorial is genius, I have made wool pumpkins before but these are so cute and well get this... no sewing!

Can you believe it? Really, unless you need to make your own tube shape - meaning you are not using a sweater sleeve or bag - well then it's rubberbands and string. crazy.
Ofcourse I started with the sweater sleeve like the tutorial shows but then well, one thing leads to another and I catch a glimpse of a grain sack out of the corner of my eye and well, I can't help myself from making one out of that too :o
This is the first one I did, a cable sleeve with the stem wrapped in green and pompoms.
I googled pumpkin leaves and found a great green sweater to make leaves out of and then added a little bling.
This one is a pretty small one, the sweater was felted pretty small but it's just too adorable!
So get on over to Hummadeedledee and see for yourself, some of you may already know Deb, as for me I just came across her blog because of these pumpkins and well I'm so glad I did! I sat staring at my computer screen for quite a while in total awe of her talents. AMAZING! Then I got busy making pumpkins! So for some inspiration and some fun... check her out and make some pumpkins!

Thanks for stopping by, Theresa xoxo